Pages

Showing posts with label Cooking. Show all posts

Tuesday, 11 July 2017

My Favourite Banana Bread Recipe


Ingredients:

  • 1 cup mashed banana
  • 1/2 cup firmly packed brown sugar
  • 2 eggs
  • 40g melted butter
  • 1/4 cup milk
  • 1/4 cup yogurt
  • 1/4 cup honey
  • 1 1/2 cups plain flour
  • 1 cup self-raising flour
  • 1 tsp mixed spice
  • 1 tsp cinnamon
  • 1 tsp bicarb soda
  • 1/4 cup sunflower and pumpkin seeds
Directions:


  1. Preheat oven to 160c fan forced. Line loaf pan with baking paper.
  2. Combine all the wet ingredients in a large bowl, then stir in the dry ingredients. Mix well then pour into loaf pan.
  3. Bake for 1 hour or until tester comes out clean.
  4. Cool on a wire rack. (or)
  5. Served yummiest warm with a smear of butter.

Wednesday, 24 February 2016

In the kitchen

Its been too hot outside this last week to do much in the garden, so I have spent a bit more time in the kitchen instead, cooking up a few different things here and there. Trying out some new arvo snacks for the kids and getting a bit of a ferment on! So I thought I would just share a couple of the recipes I have used this week in case anyone is interested. Firstly I made Eggplant Kasundi. I kinda followed this recipe from Cityhippyfarmgirl with a few changes. This is a delish relish kinda thingy. Goes nice with eggs, steaks, sausages (thats all I've tried it with so far, but you get the gist).

Eggplant Kasundi


  • 1kg eggplants
  • 400g tomatoes
  • 3 medium onions
  • 5 cloves of garlic
  • 1 knob of fresh ginger
  • 2 tbsp mustard powder
  • 2 tbsp cumin
  • 2 tbsp coriander
  • 6 tbsp olive oil
  • 1 cup honey
  • 100ml vinegar
  • 100ml white wine vinegar
  • 50ml balsamic vinegar
  • 3 tsp salt

In a large pot add the ginger, garlic, onion and oil. Cook it up, stirring continuously over a medium heat, add your spices and continue to stir for a couple of minutes. Add diced eggplants and diced fresh tomatoes. Continue stirring intermittently, pop the lid on and let the mixture cook down a little further, (you want the eggplant to be soft and cooked through.) 


Add the apple vinegar's, honey and salt, continue cooking (stirring occasionally) over a low heat for approximately 1 hour or until mixture thickens and comes together. Pour hot mixture into sterilised jars. Store in the fridge or water bath to store for longer.

Eggplant Kasundi.

As some of you saw on my facebook page I also made a fresh batch of Kombucha. These are the different measurements I use up to 6 litres.

1L
70-90g sugar
1-2 tea bags
50-100ml previous kombucha 'juice'

2L
140-180g sugar
2-4 tea bags
100-200ml previous kombucha 'juice'

3L
210-270g sugar
3-6 tea bags
150-300ml previous kombucha 'juice'

4L
280-360g sugar
4-8 tea bags
200-400ml previous kombucha 'juice'

5L
350-450g sugar
5-10 tea bags
300-500ml previous kombucha 'juice'

6L
440-540g sugar
6-12 tea bags
400-600ml previous kombucha 'juice'

My Kombucha scoby (symbiotic colony of bacteria and yeast) about to go into its fresh batch of tea.

So, firstly you boil 1L of filtered (dont use plain tap water, the chlorine in it will kill the scoby mother!) and pour into a glass jug with the sugar and tea bags. Stir until sugar is dissolved and let the tea brew until the liquid is room temperature or the same as the scoby. You must make sure they are both at the same temp otherwise the excess heat will kill the scoby as well. Pour liquid into a large glass jar (this really should be glass and definitely not any kind of aluminium or steel as this will effect it and again kill it...Sounds pretty hectic, huh?) - or whatever size you are using and fill with more filtered water. Add the scoby and extra kombucha 'juice'. Cover with a breathable cloth and secure with a rubber band and set aside where it wont be disturbed for as long as your taste desires. I leave mine for 2 weeks to develop a lovely carbonated taste. Be careful not to leave for too long as it will start to turn to vinegar. Dont worry about the sugar content, this is what the scoby feeds on, so by the time you drink it, all the sugar will be 'consumed' by the scoby and minimal if any by you. Then you are left with a delicious fermented probiotic drink that can aid your health in many ways. Check out these pages if you are interested in reading more.
Food Renegade - Kombucha health benefits
Wellness Mama - the Benefits of Kombucha


Apple Cider Vinegar day 1.

And finally I have started to make my first batch of apple cider vinegar. This may sound grose, but I keep the kids half eaten apples, give them a rinse then chop them up and put into a jar. I add the apples to about 3/4 full then top with filtered water. For each cup of water I add a table spoon of sugar. Make sure the sugar dissolves (I gave a good few shakes with a lid on), cover with a breathable cloth and secure with a rubber band. Leave to sit on the bench for a couple of weeks, it should 'grow' a mother on top - this is great, it means its working.  Drain of the liquid (keep it, discard the apple bits) and leave again for another 2-4 weeks until it has a lovely vinegar smell. This can then be stored indefinitely but I am sure it will be used up pretty quickly. 

Hope you all try one of these or all of them, let me know how you go. Talk soon. x


Saturday, 28 November 2015

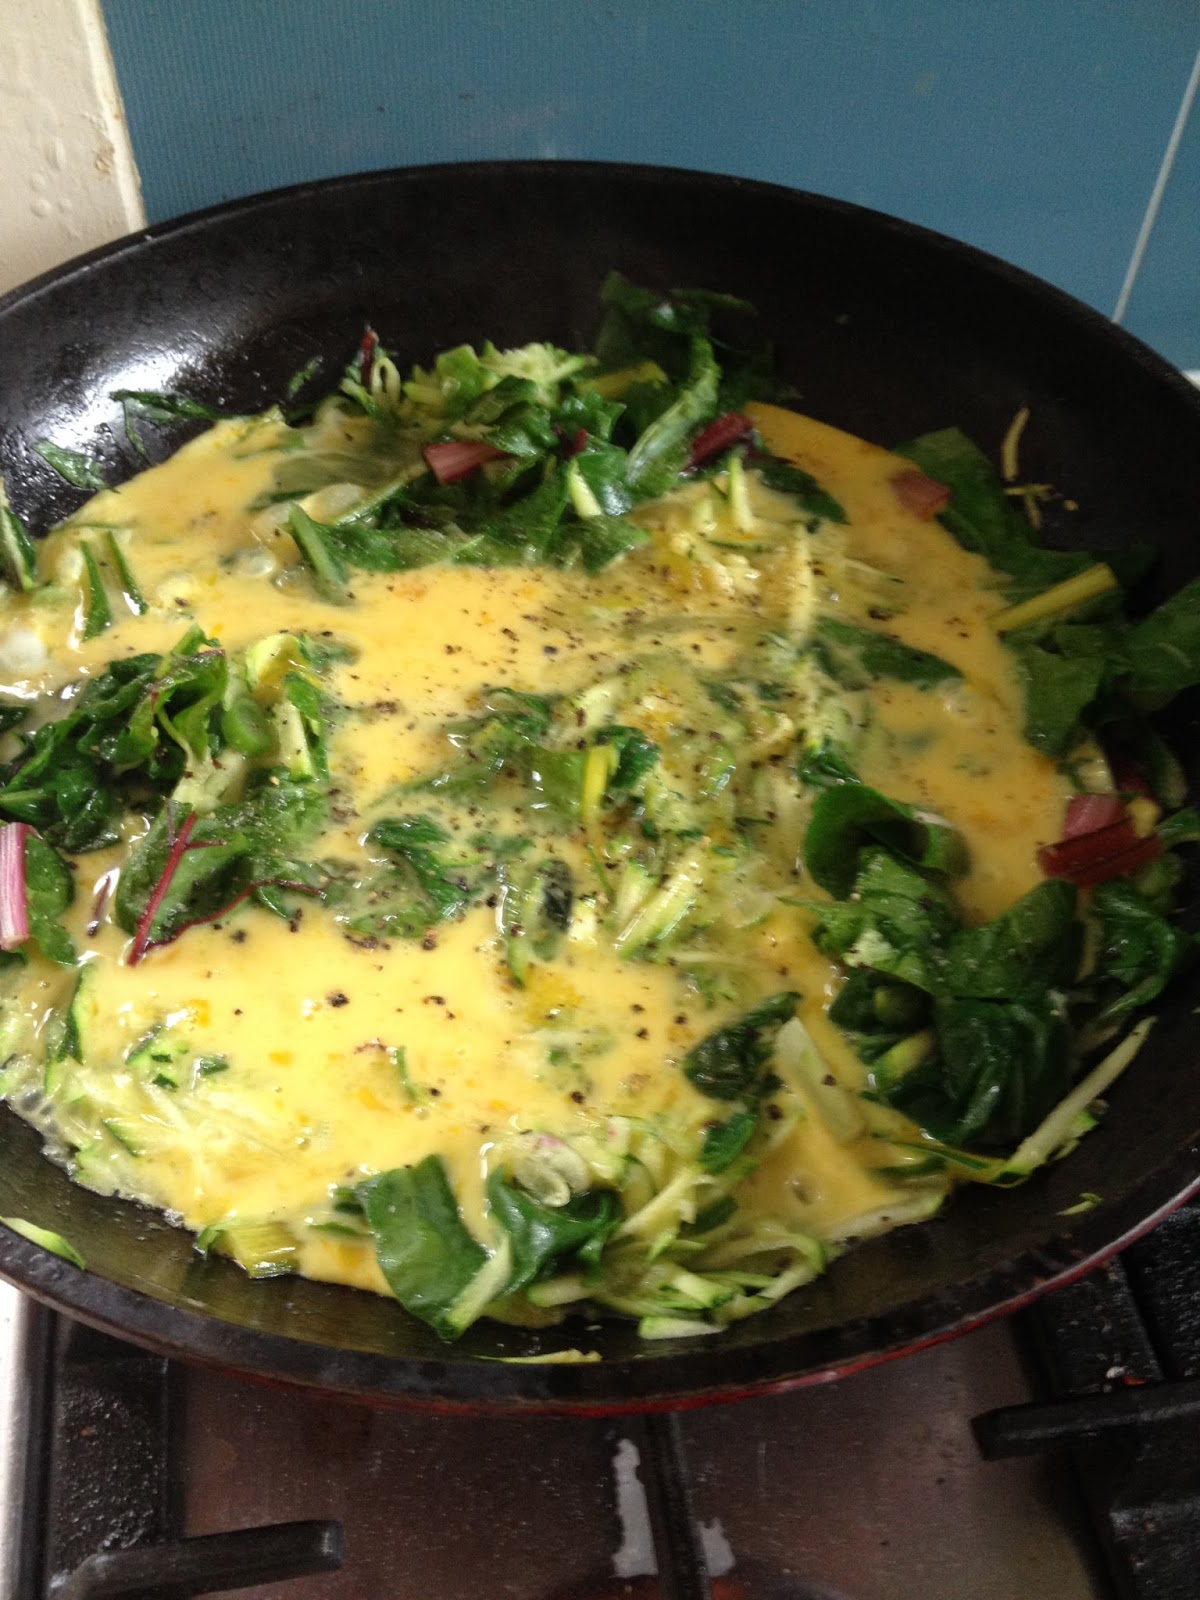
Supercharged Green Eggs

Day 5 of a 'zucchini recipe a day' brings a simple meal to start the day and with all the good stuff coming from just outside my back/front door. Getting back home this morning from making a new PB at my local Parkrun, this was the perfect way to replenish myself. 

Supercharged Green Eggs

Ingredients

  • 1 tbls butter
  • 1-2 Shallots, sliced (garden)
  • Bunch rainbow chard, chopped (garden)
  • 1 zucchini, grated (garden)
  • small handful basil (garden)
  • 3 eggs (from Trixie)
  • splash of milk
  • 1 tbls flaxseed
  • 1 tbls parmesan
  • salt and pepper
  • sauerkraut to serve (homemade)


Directions

Place pan over medium heat and melt butter. Add all veges and saute for 30 seconds. 


Add combined egg and milk and pour over greens. Cover with a lid and cook for a minute of so until the egg is set. Try not to cook for too long as you want the veges to keep there fresh green colour and flavour.


Serve with a sprinkle of flaxseed and parmesan cheese and a side of home made sauerkraut and eat straight away!!! I had to share with my littlest kidlet, she loves her eggs and sauerkraut!


Friday, 27 November 2015

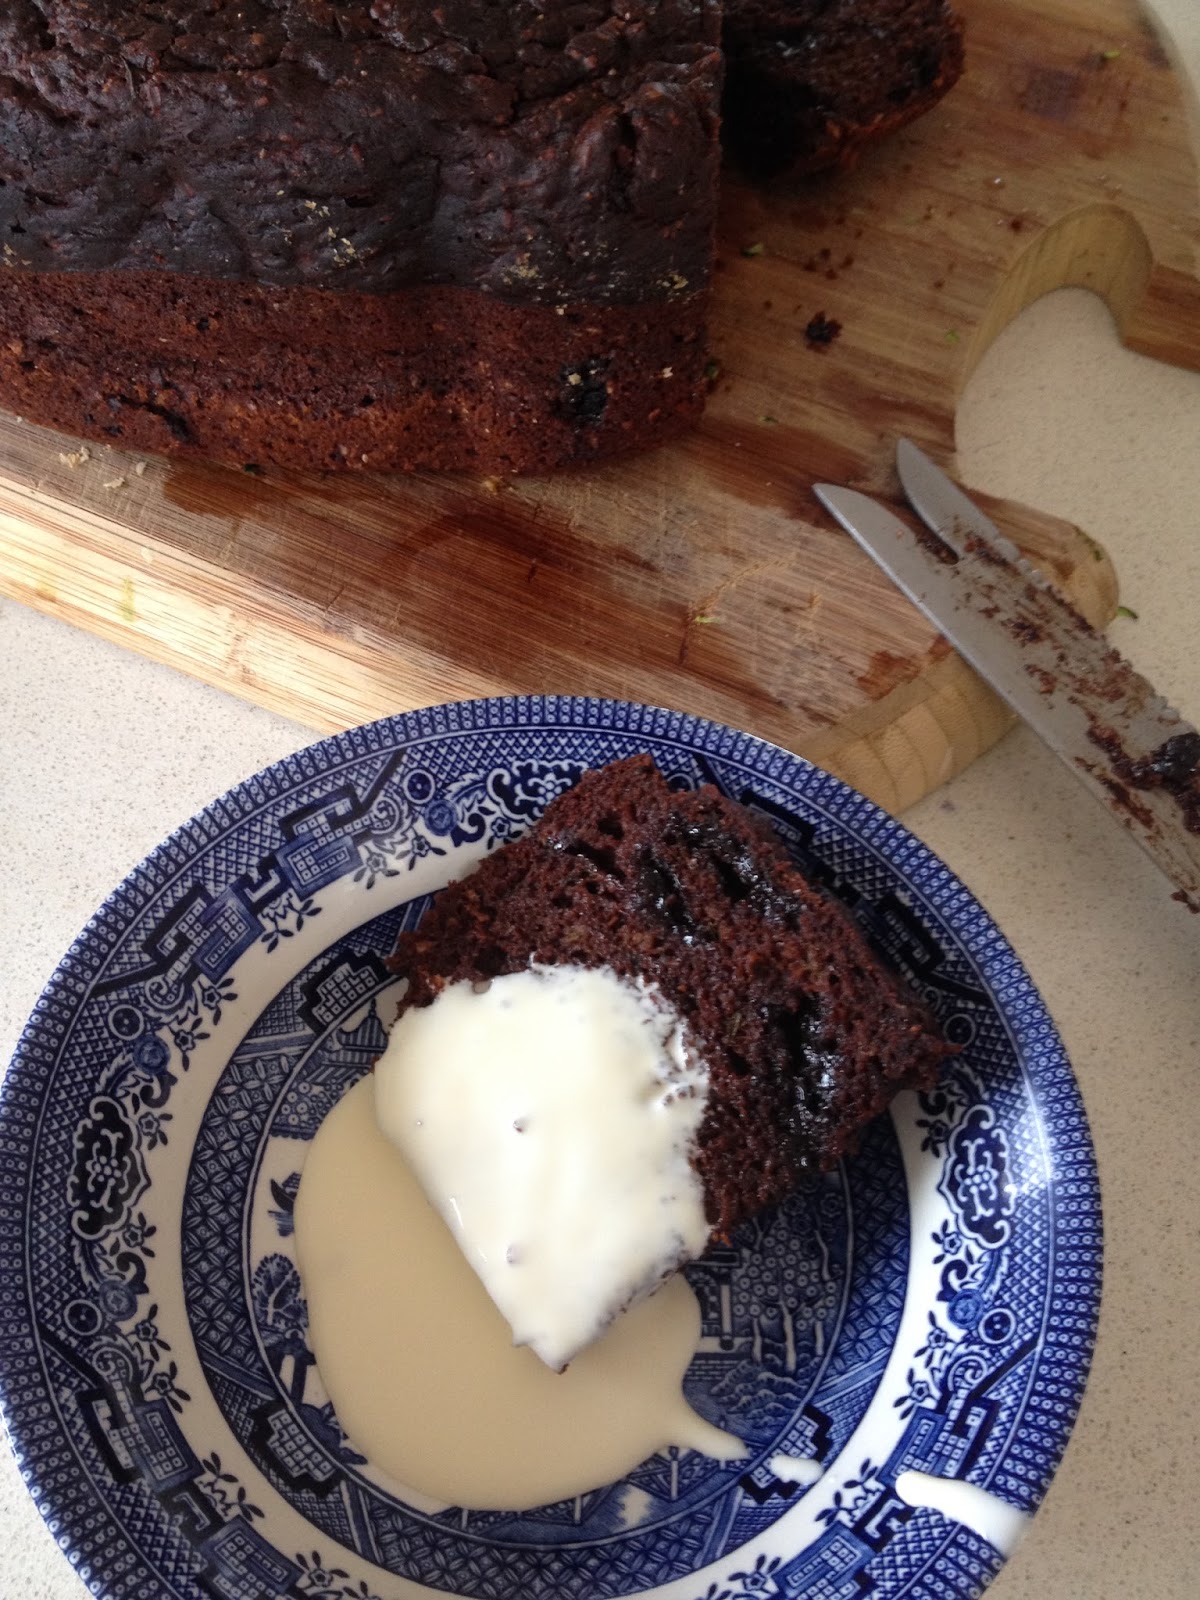
Zucchini Brownie Cake Slice thingy

Another sneaky vegetable cake the wee ones don't realise is actually a pretty healthy treat. All depends on your view as to what is healthy though I guess, but I put this one in the good category. So long as its not eaten for every meal, although I could and would have when I was pregnant and wished I thought of this version then! Again, I baked this in my bread machine so final results will look a little different, taste is still going to be YUM!

Zucchini Brownie Cake/Slice

Ingredients

  • 2 cups zucchini, grated (from my garden)
  • 1/2 cup melted and cooled coconut oil (or very light olive oil)
  • 1/2 cup honey 
  • 2 large eggs, at room temperature
  • 1 teaspoon vanilla extract
  • 1 3/4 cup whole wheat flour
  • 1/2 cup unsweetened cocoa powder
  • 1/2 teaspoon salt
  • 1 1/2 teaspoons baking powder
  • 1/2 teaspoon cinnamon
  • 1/8 teaspoon nutmeg
  • 3/4  cup dark chocolate chips

Directions

Preheat the oven to 180 degrees. Grease a baking/loaf dish. In a large mixing bowl, beat together the coconut oil, eggs, honey and vanilla. Add zucchini. In a separate bowl, combine flour, cocoa, salt, baking powder, cinnamon, and nutmeg. Stir to combine.


Add dry mixture to the wet zucchini mixture. Stir to combine. Add chocolate chips. Pour batter into prepared pan.


Bake 40-45 minutes or until a fork inserted in the center comes out mostly clean. Let cool completely before removing from dish. (In my bread maker it takes about 1.5 hours as its a 'deep' mix baking in the loaf pan.)


Thursday, 26 November 2015

Zucchini Lasagna

Today I bring a dish my little  sister shared with me. I have altered it a bit from her version to suit our family. This recipe makes a double batch, so you can freeze half for another night. As you know my oven is broken so I cooked this slowly in my electric fry pan, pretty good for a backup.

Zucchini Lasagna

Ingredients

  • 3 brown onions, diced
  • 5 garlic cloves, minced (from my garden)
  • 1kg beef mince
  • 1 cup red wine
  • 4 - 5 tins diced tomato ( I used my own homemade diced tomato)
  • 1/2 cup tomato paste
  • fresh or dried herbs like parsley, oregano, rosemary and basil (from my garden)
  • salt and pepper
  • 1 cup ricotta cheese
  • 1 cup sour cream
  • 1 tbls butter
  • 1 tbls plain wholemeal flour
  • 2 cups milk
  • Dried or fresh lasagna sheets
  • 3 large zucchinis, thinly sliced length ways (from my garden)
  • 2 cups grated cheese

Directions

First make a basic tomato/mince sauce. Saute the onion and garlic and herbs until soft. Add the mince and brown off. Pour in red wine and allow it to reduce a little. Add diced tomato, tomato paste and salt and pepper for seasoning, bring to the boil and then reduce heat to very low and simmer until the sauce has reduced right down and is thick. Normally at least an hour.


I then combine ricotta cheese and sour cream and set aside. I also make a white sauce. Melt butter and stir in flour. When combined add milk slowly and whisk until smooth. Salt and pepper to taste. You can add cheese if you like, but it is not necessary.


Once sauces are ready its time to assemble. First start with a thin layer of meat sauce and top with lasagna sheets, then another meat sauce layer, followed by zucchini layer then ricotta sauce, lasagna sheets, meat sauce layer, zucchini layer then white sauce and finished with grated cheese scattered over the top.


Pop into a preheated 200 C oven and bake for a good hour or so and you can easily slice a knife in. Serve hot with a nice salad.


Wednesday, 25 November 2015

Zucchini Cake

Today's little zucchini delight is a treat for anytime of the day or night. We sneak a slice with a little (ok a lot) of cream and a cuppa tea after the kids have gone to bed. Great for a lunch box snack with a smear of butter too for the kids. None of this beauty is ever wasted!

Zucchini Cake

Ingredients
  • 3/4 cup honey
  • 1 cup olive oil
  • 3 eggs, lightly whisked (from Trixie)
  • 3 cups coarsely grated green zucchini (from my garden)
  • 2 1/2 cups plain wholemeal flour
  • 2 tsp baking powder
  • 1/2 teaspoon bicarbonate of soda
  • 3/4 cup pepita seeds (or any other nut or seed)
  • 1 cup whole dried pitted dates, coarsely chopped
  • 1/2 teaspoon ground cinnamon
  • 1/4 teaspoon ground nutmeg

Directions

Preheat oven to 180°C. Lightly grease a loaf or cake tin.

Use an electric beater to beat together the honey, oil and egg in a large bowl until pale and creamy. Add the zucchini, flour, baking powder, bicarbonate of soda, pepitas, dates, cinnamon and nutmeg, and stir with a wooden spoon until well combined. Pour into the prepared pan.

Bake in oven for 1 1/4 hours or until a skewer inserted into the center of the cake comes out clean. Remove from oven and set aside in the pan for 30 minutes to cool. Turn onto a wire rack to cool completely.

*As my oven is not working at the moment, I baked mine in the bread machine this time round. After all the ingredients were combined I poured into my bread/cake dish and baked for the same time.

Enjoy x


Tuesday, 24 November 2015

Crispy Zucchini Flowers Stuffed with Ricotta and Choc Mint

I'm going to do something a little different this week. As I have so many zucchinis I have decided I am going to post a recipe a day for the next week using the zuc's from my garden - along with anything else I manage to forage for and use. First up I'm using zucchini flowers. There are plenty of different ways to cook the flowers and this one had the kids gobbling them up!

Crispy Zucchini Flowers Stuffed with Ricotta and Choc Mint

Ingredients
  • 300g ricotta cheese (I made my own which I'll share another time)
  • a pinch of ground nutmeg or fresh if you grow it
  • a small handful freshly grated Parmesan
  • 1 lemon, zest finely grated, plus lemon slice for serving
  • a small bunch fresh choc mint, leaves picked and finely chopped (from my garden)
  • 1 to 2 fresh red chilies, halved, seeded and very finely chopped (from my garden)
  • salt and pepper
  • 1 cup plain flour
  • tsp baking powder
  • 1 cup white wine or sparkling water
  • 10 or so zucchini flowers - male or female (from my garden)
  • olive oil

Directions

Mix the ricotta in a bowl with the nutmeg, the Parmesan, lemon zest and most of the chopped mint and chilies. Season carefully, with salt and pepper, to taste.


To make a lovely light batter, put the flour and baking powder into a mixing bowl with a good pinch of salt. Pour in the white wine and whisk until thick and smooth. At this point the consistency of the batter should be like heavy cream or, if you dip your finger in, it should stick to your finger and nicely coat it. If it's too thin, add a bit more flour; if it's too thick, add a little more wine.


Open the zucchini flowers up gently and with a teaspoon, carefully fill each flower with the ricotta mixture until just full. Carefully press the flowers back together around the mixture to seal it in. Then put the flowers aside. 


Get the pan ready for frying and a plate with paper towel for draining then one by one, dip the ricotta-stuffed flowers into the batter, making sure they're completely covered, and gently let any excess drip off. 


Carefully put them into the hot oil. Don't crowd the pan too much otherwise they'll stick together. Fry until golden and crisp all over, then lift them out of the oil and drain on the paper towels. 


Serve with a lemon squeeze or some sweet chili sauce (home recipe of course) and eat immediately while crispy.


Tuesday, 8 September 2015

Preserving food using the water bath method

Cooking from scratch is one of the biggest ways I can contribute to the well-being of my family. A little while ago I bought a big pot to attempt canning or preserving food and I finally got started on that last night. In the morning I went into my local fruit and veg grocer to check the discounted trolley and found about 5kgs tomatoes for $3 and 4kgs extra ripe strawberry's for $8. From that I got 10 jars diced tomato (30 cents a jar), and 10 jars or strawberry jam (80 cents a jar). So not only do I know exactly whats in the jars, they are also so much cheaper than anything I can buy in the shop. Sweet!!

Strawberry Jam, diced tomatoes, water bath and stock all on the go!

The method I used is the water bath method. I dont like to use anything fancy and also prefer to use what I already have. So I recycled jars that I have kept. One note of importance if reusing jars like this is to make sure they have no cracks and the lids are intact with no signs of wear or rust.

Items you will need:

  • A large stock pot.
  • A tea towel or a round cake rack to put under the jars to prevent them from touching the hot bottom of the pot.
  • Recycled jars.
  • Tongs and hand mittens.

Instructions:

Prepare the jars.

  1. Before you start check the jars for cracks or chips and the lids for rust or dents. Never use damaged jars or lids.
  2. Wash the jars and lids and boil gently for 5 minutes in a pot to sterlise. 
  3. Allow to cool slightly on a rack.

Diced tomato ready to store.


Fill the jars with goodness.
  1. Pour or spoon the hot contents you have prepared into the warm jars.
  2. Leave about 8mm from the top to allow the contents to expand when boiling.
  3. Make sure there are no air bubbles as this may allow mold to form whilst in storage.
  4. When the jar is full, screw the lids on fairly tight and wipe the jars clean.

Give the jars a bath and store.
  1. Place the jars into the pot (on top of the cake ring) and fill with warm water until the jars are covered by 1-2 inches of water.
  2. Bring the water slowly to the boil. Once it is gently boiling leave for another 45 minutes for small jars and up to 1 hour for larger jars.
  3. When time is up carefully remove the jars with tongs and hand mittens and place on a tea towel to cool. The prolonged heat will form a vacuum in the jars.
  4. When the jars are cool check the lids are inverted. The jars must have a perfect seal to allow for storage in the cupboard.
  5. Store them in a dark cupboard and they will last up to a year without losing their nutrition.

 
Strawberry jam galore.


Now my fingers are crossed that my jam sets nicely. Yes I did use sugar (gasp!! I know), but I have tried to use a fair bit less.....plus some lemon juice - supposed to help it set? Preserving food like this is so easy. My next idea is to make some curry sauces to store so that I can use them on the nights where I am a bit time poor, my own version of Chicken Tonight or Kan Tong.....


Monday, 31 August 2015

ABC Muffins (Apple, Banana & Chocolate)

Ingredients

  • 3/4 cup whole wheat flour
  • 3/4 tsp baking powder
  • 1/4 cup rolled oats
  • 1/4 cup honey
  • 1 egg
  • 1/3 cup milk
  • 1/4 cup oil
  • 1 small apple grated
  • 1 small banana chopped finely
  • 80g choc chips

Instructions

  1. Preheat oven to 180 degrees Celsius. Line muffin tray with cases.
  2. Combine flour, baking powder and oats in a bowl.
  3. Stir in combined honey, egg, milk and oil.
  4. Add apple, banana and choc chips and gently combine.
  5. Divide mixture into cases and bake for about 15 minutes.
  6. Turn onto a wire rack to cool.

Whole wheat tortilla

Ingredients

  • 2½ cups whole-wheat flour
  • ½ cup olive oil
  • 1 teaspoon salt
  • 1 cup warm water
Instructions
  1. In a bowl mix the flour, oil and salt until crumbly, about 3 to 5 minutes. 
  2. Gradually add the warm water and continue mixing until the dough is smooth, about 3 minutes.
  3. Take out the dough and divide it into 12 equal sized pieces. I do this by making the dough into a big log shape, then I cut it in the middle. Then I cut each of those pieces in the middle and so on until you have about 12 pieces.
  4. Using the palms of your hand roll each piece into a round ball and flatten it out on a baking tray or board. Cover and let rest at room temperature for at least 15 minutes or up to one hour.
  5. Heat a frypan/grill over med-high heat. The pan should be fairly hot before you begin cooking the tortillas.
  6. On a very lightly floured board or counter top, use a rolling pin to turn each ball into a flat circle. Be careful not to use more than a teaspoon or two of flour when rolling out each ball into a tortilla because too much excess flour will burn in the pan.
  7. Grease the pan with a touch of oil and then carefully transfer each tortilla, one at a time, to the pan and cook until slightly brown, about 30 to 45 seconds per side. Set aside on a plate to cool slightly. Eat within an hour, refrigerate or freeze.

LinkWithin

Related Posts Plugin for WordPress, Blogger...